Offroad Trailblazers and Envoys

Spark Plug / Throttle Body Cleaning

Trailblazer and Envoy related, but not off-road related...

by DirtyBacon04 » Sat Aug 03, 2013 11:48 am

Well since I already had the plastics off the engine trying to diagnose the P0303 code, I figured I'd clean the throttle body and change all the spark plugs. And since I was doing that, I figured I'd document my adventure, and hopefully it'll be of some use to someone. I know for some of us this might be a simple task; but this forum is growing, and growing quickley and this might help our new members.

Items needed:
-10mm socket w/ extensions
-Flathead screwdriver
-5/8" sparkplug socket
-Can of throttle body cleaner
-Anti-seize
-Silicone Grease
-(6) replacement spark plugs (always ACDelco Iridiums)
-Mechanics Gloves (recommended)


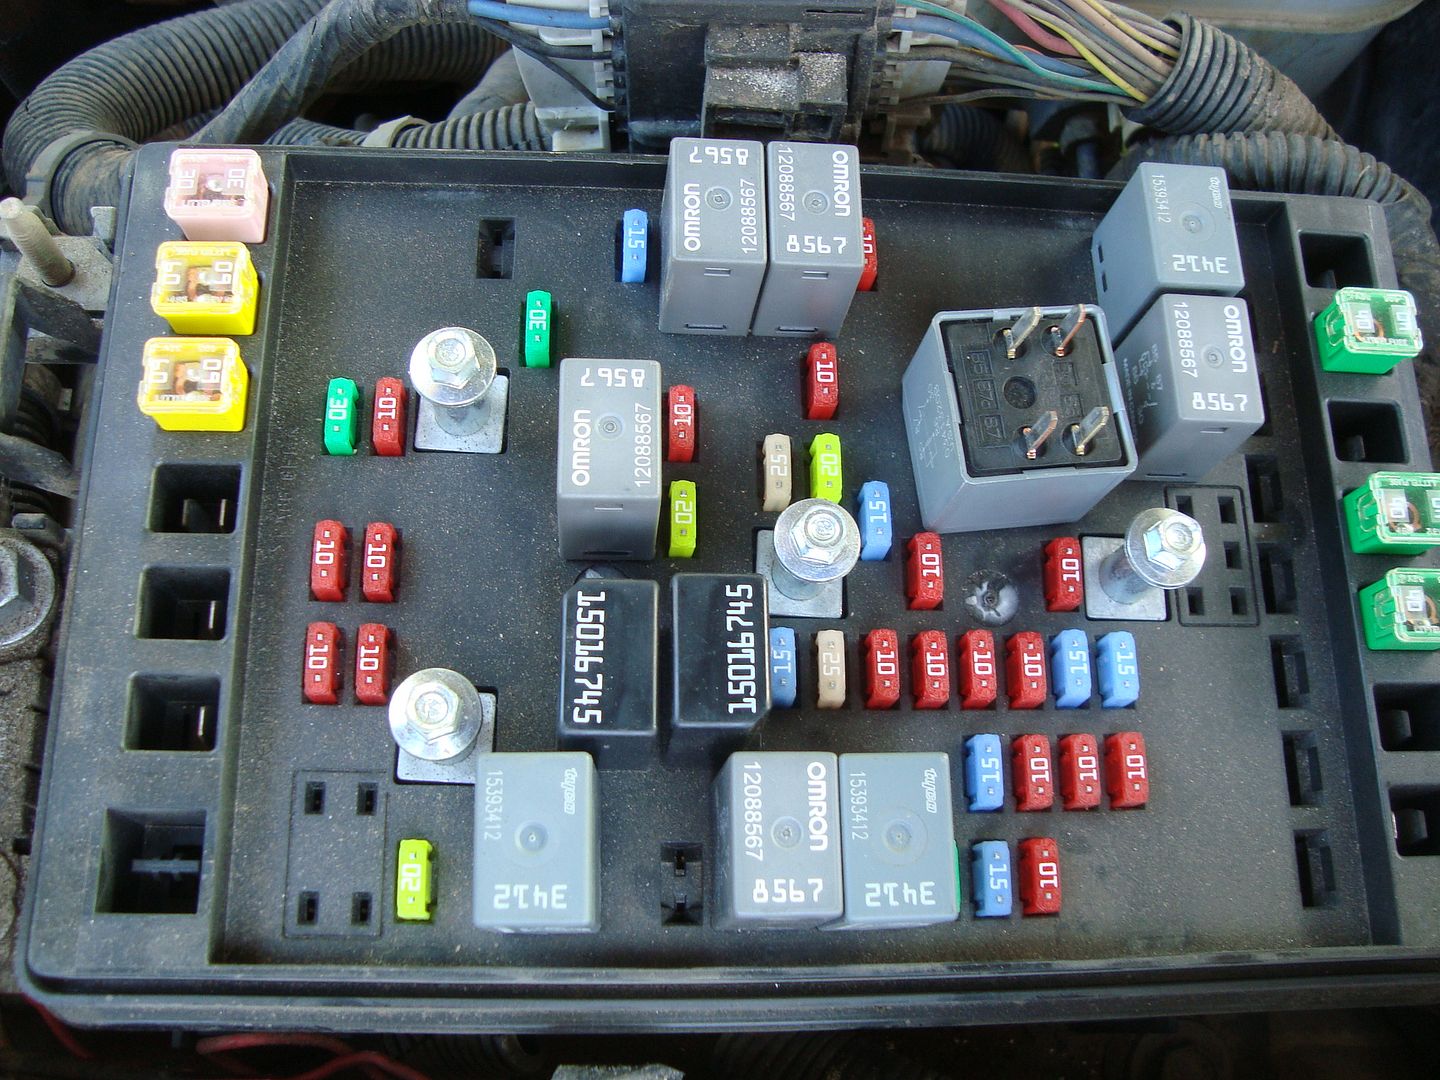
I remove the relay for the starter as opposed to disconnecting the battery. There's plenty of info out there as to why it's not good to disconnect the battery to our platform. Here's the best(only) video on that topic


Image

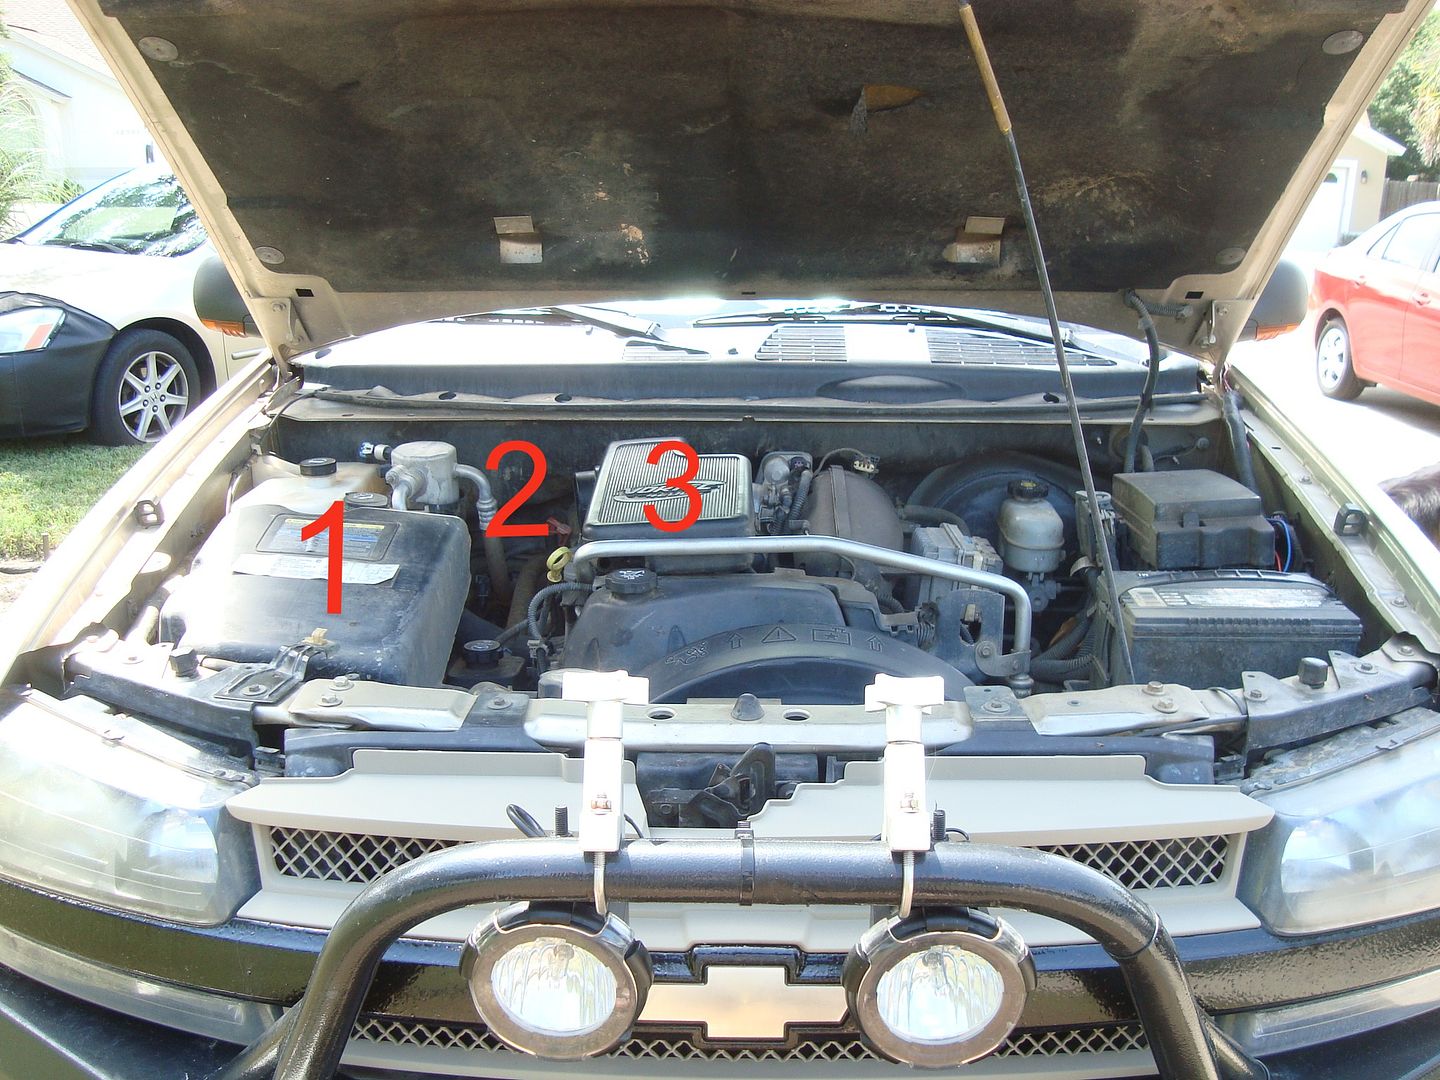
Remove Air box(1), intake tube(2), and intake resonator (3). (my intake tube had been removed prior to this picture, but thats where it should be)
Image

The intake resonator is only held on by these two 10mm bolts and the hoseclamp from the throttlebody connection
Image

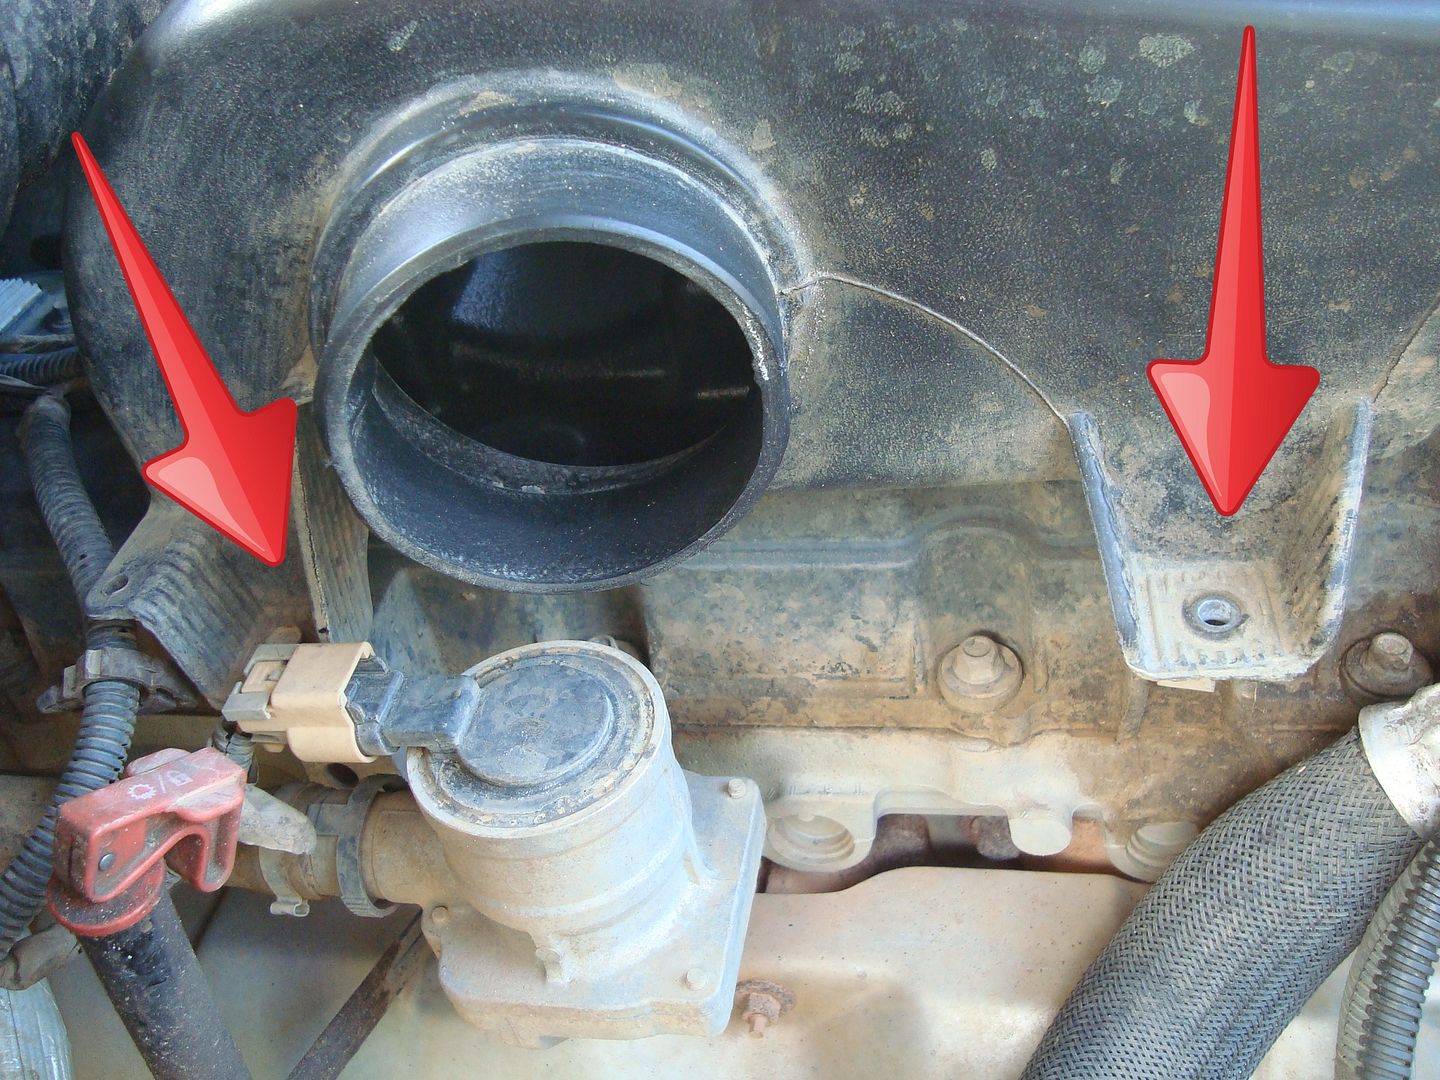
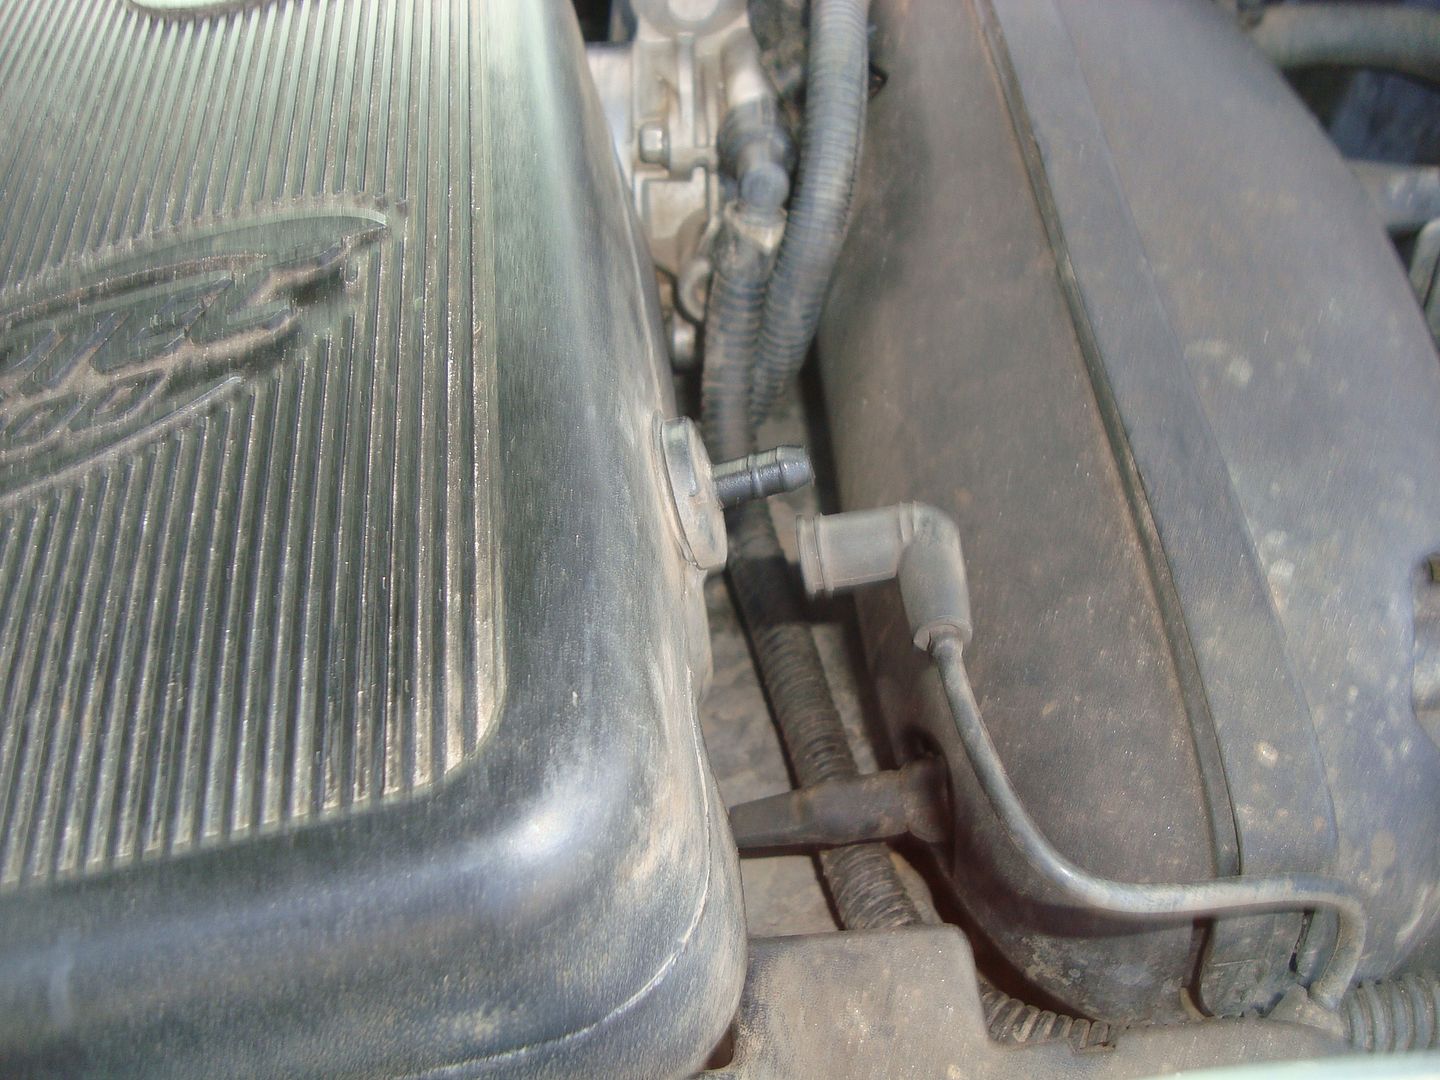
unplug this vacuum hose to the FPR (fuel pressure regulator) [Edited by Roadie]
Image

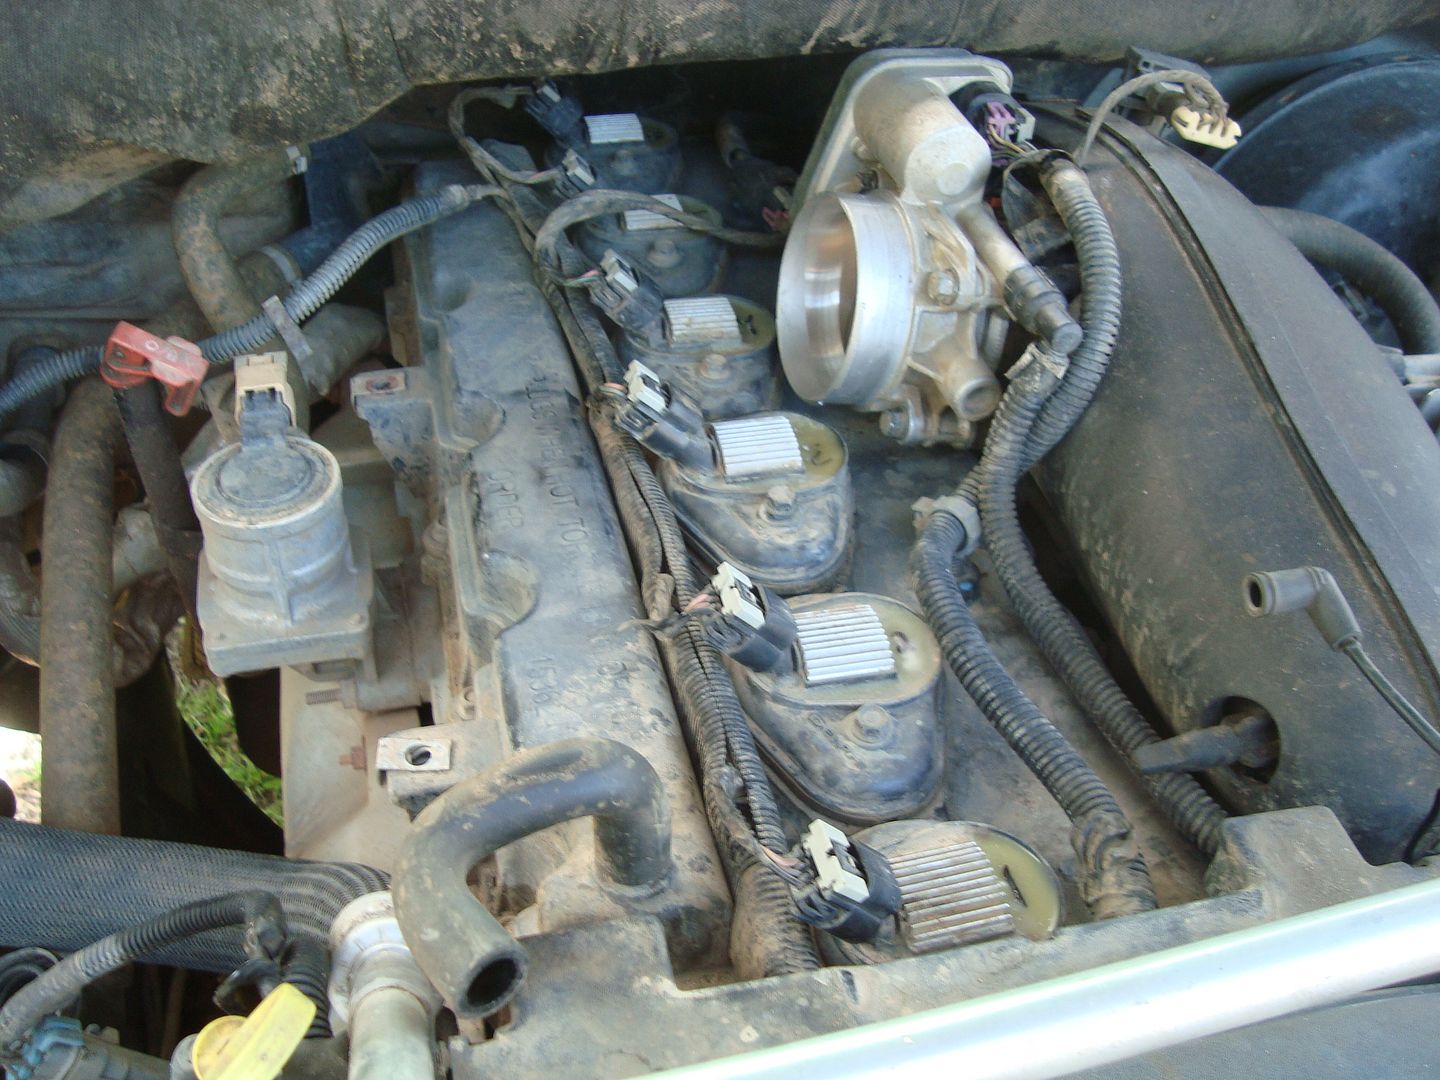
This is what you should be looking at.
Image

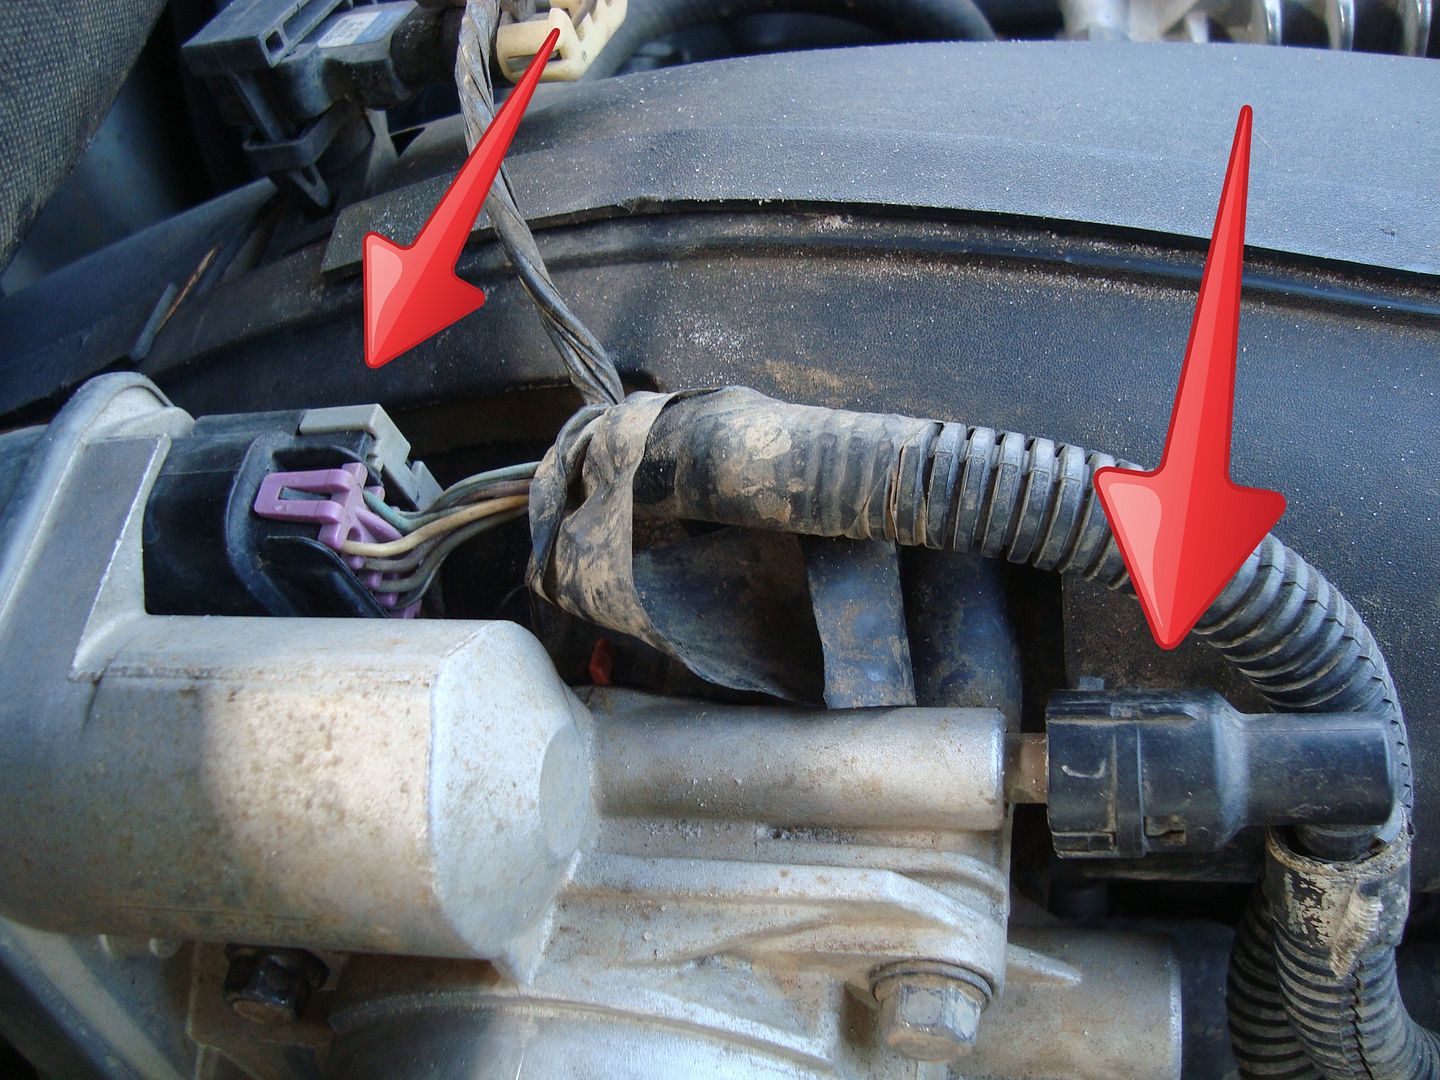
Disconnect the two connections to the throttle body
Image

Remove the (4) 10mm bolt that hold on the throttle body
Image

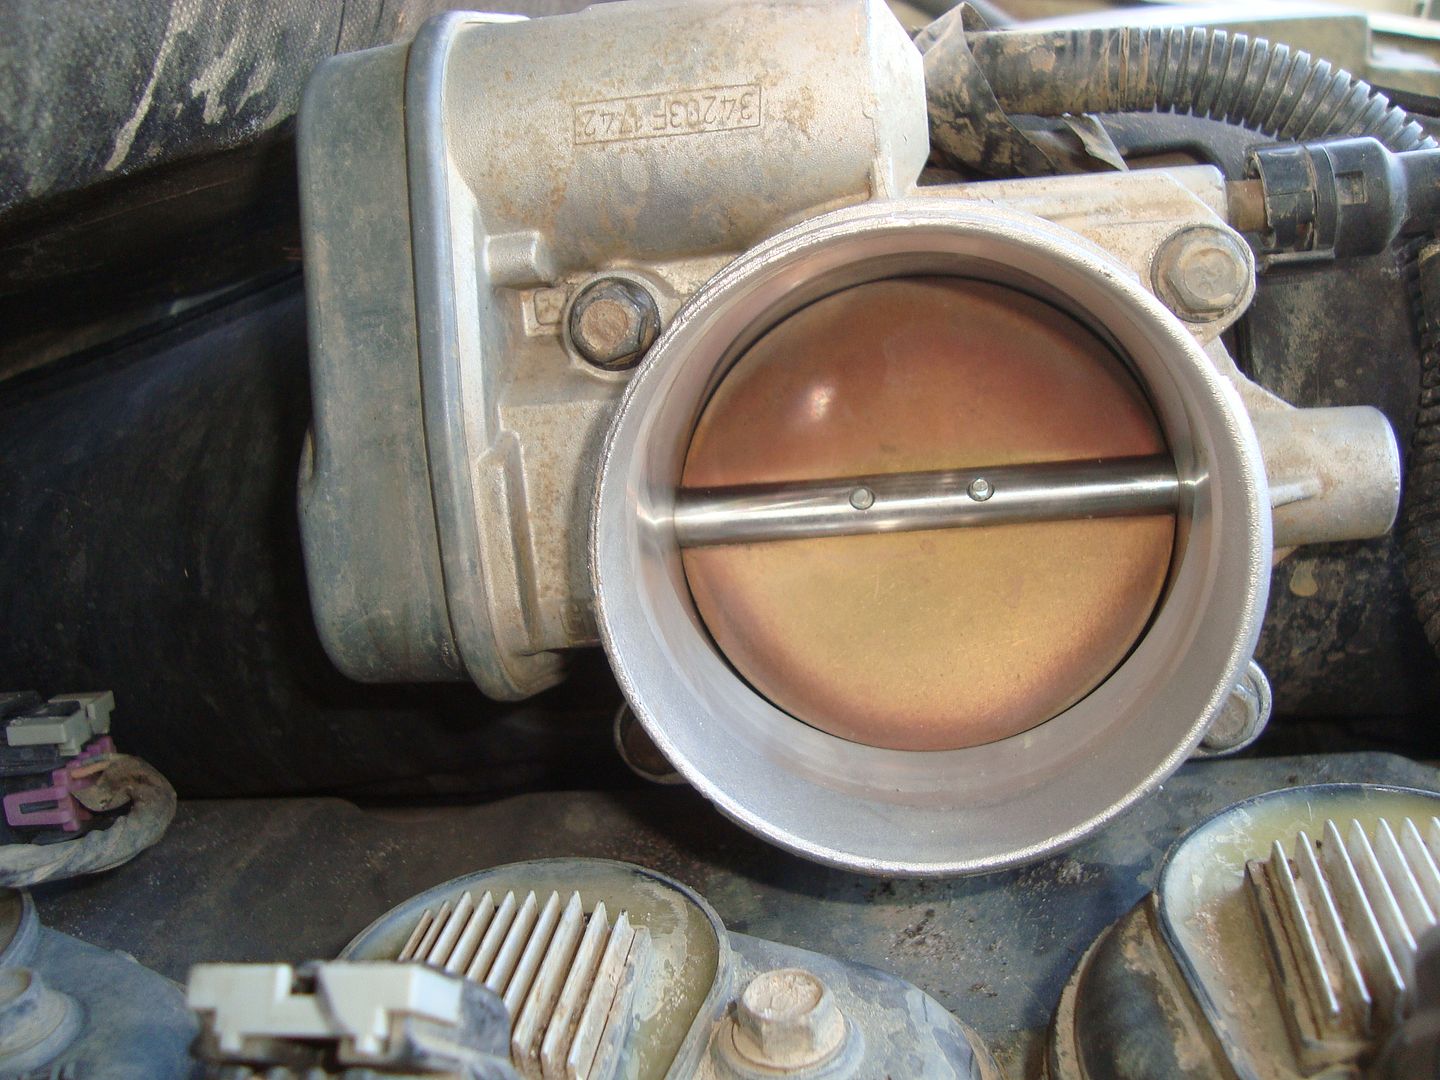
Proceed to use your throttle body cleaner to blast away all the gunkyness. Make sure you move the butterfly valve while you do this, to ensure total coverage. Ensure you use "throttle body" cleaner, not carb cleaner. The chemicals are harsher in carb cleaner and could damage the throttle body, or so my research says.

Once the throttle body is cleaned, set it aside. Now we begin the coil back removal. Each cylinder has it's own coil pack that is held in by one 10mm bolt. Unplug each pack then remove the bolt, and pull up gently on the coil pack; the bottom is the boot for the spark plug. You should hear a the "poopity ploop" of the boot unseating from the plug. The #5 and #6 cylinders can be kind of a bitch so make sure no kids or holy men are around.
Image

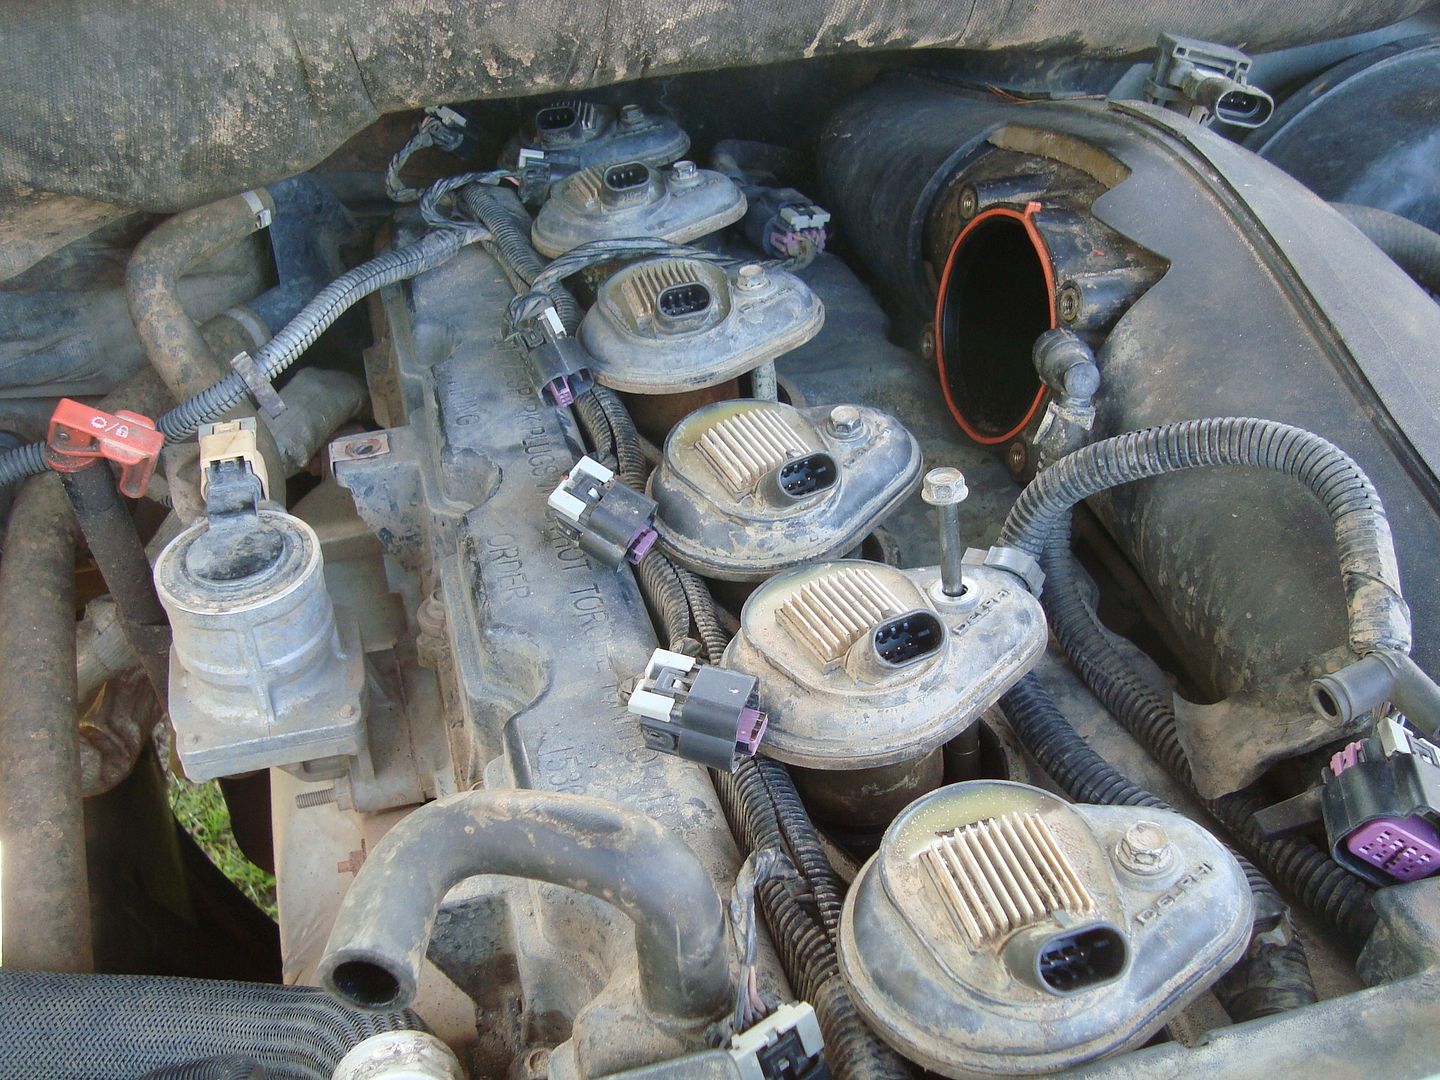
Remove each spark plug with the 5/8" sparkplug socket. Apply anti seize to the threads of the new plugs and silicone grease to the otherside
Image

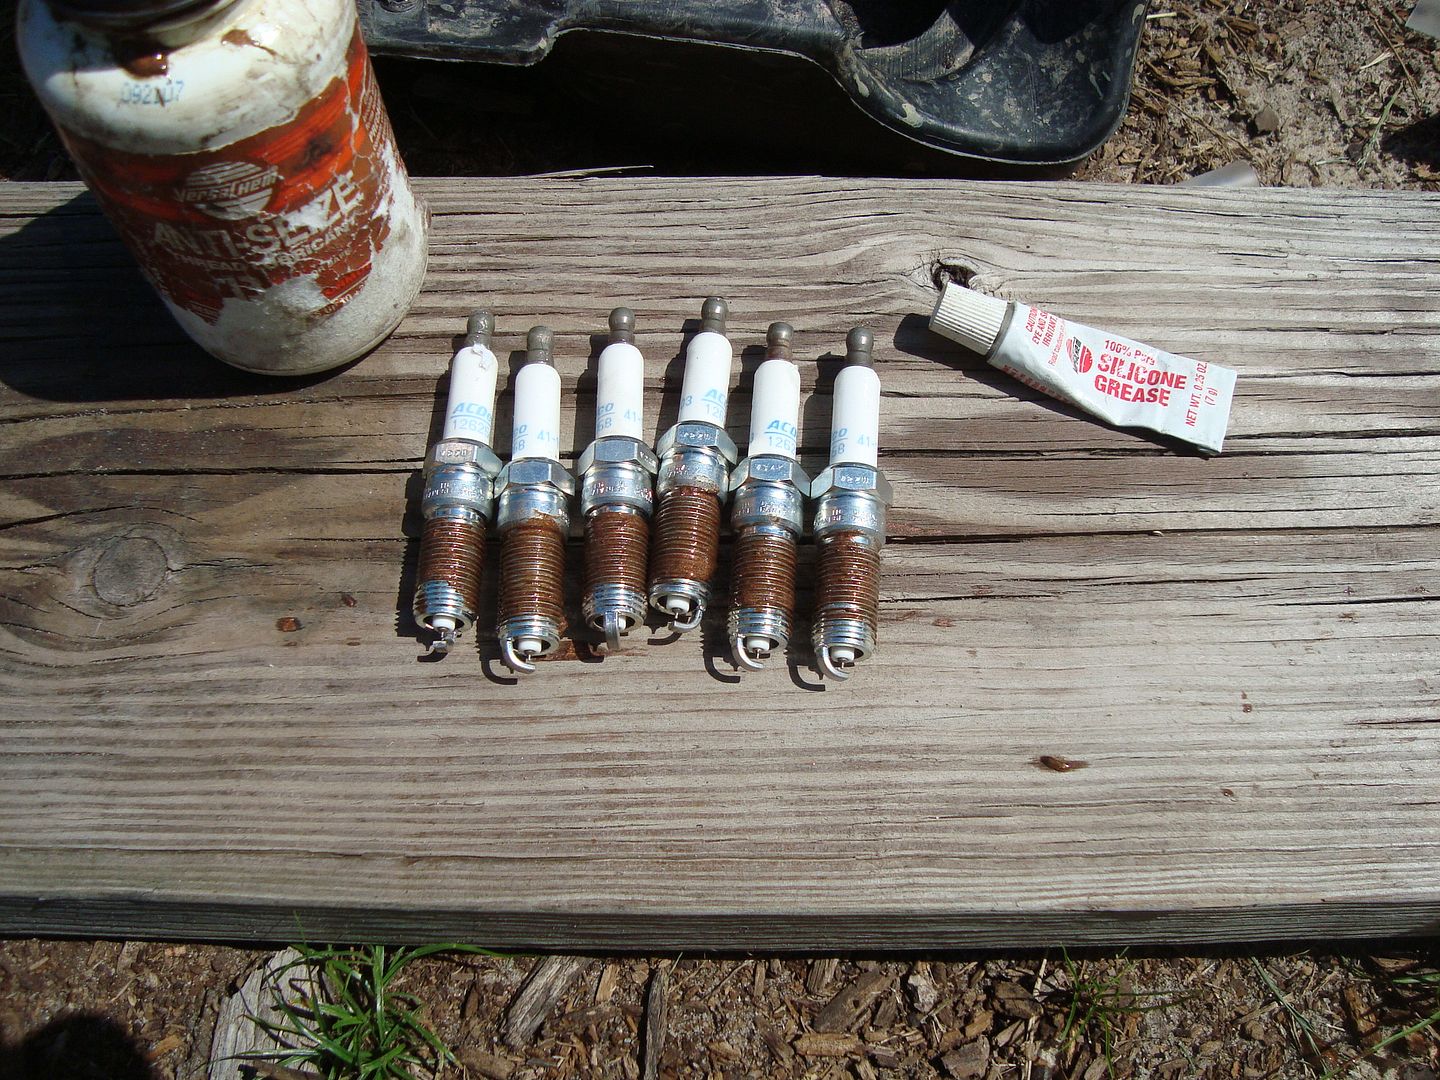
Install new spark plugs and torque to 13ft lbs. Assembly is reverse procedure. Ensure you reinstall any relays or fuses that you pull.

Take old spark plugs and do what you wish to/with them. Make a necklace, shoot them, weld them somewhere as decorations, etc. The options are endless.

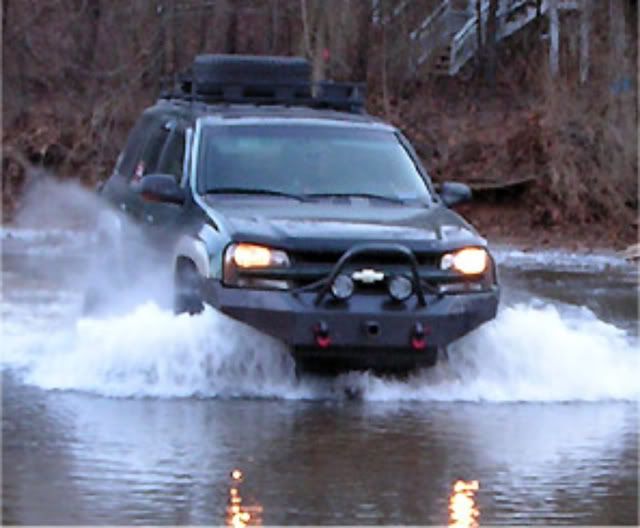
Now get out there and get lost, get stuck, and save yourself. :flex dirty: :drive:

This is by no means the "100% correct" way to do this. Everyone has different methods, but this is mine.
Last edited by DirtyBacon04 on Mon Mar 17, 2014 1:21 pm, edited 2 times in total.
Trans-Continental Trailblazer - 5th Award
Current Count of Transmission Rebuilds: 5.5
***The more you know, the less you need.***
USMC '07-'12
Dirty Bacon's Build
User avatar
DirtyBacon04
Moderator
 
Posts: 3048
Joined: Fri Aug 05, 2011 4:59 am
Location: AK, Fairbanks
Name: Michael
Vehicle Year: 2004
Vehicle: Chevrolet TrailBlazer
DriveTrain: 4WD w/ Aftermarket Locker
Rank: Expedition Rated

by jonbo2002 » Mon Aug 05, 2013 3:24 pm

Nice write up Bacon, and great pics. The only thing I did differently was found it easier to remove the throttle body once coil 3 and 4 were off. Makes the lower bolts easier to access.
jonbo2002
Addict
 
Posts: 509
Joined: Fri Mar 29, 2013 8:22 am
Location: MI, Springport
Name: Jon
Vehicle Year: 2002
Vehicle: Chevrolet TrailBlazer
DriveTrain: 4WD w/ G80

by DirtyBacon04 » Mon Aug 05, 2013 8:04 pm

Yea, thats how i did it the time before. But hopefully people are cleaning their TB more than they are changing their spark plugs, so i figured it'd be better to have it set up with each seperate task.
Trans-Continental Trailblazer - 5th Award
Current Count of Transmission Rebuilds: 5.5
***The more you know, the less you need.***
USMC '07-'12
Dirty Bacon's Build
User avatar
DirtyBacon04
Moderator
 
Posts: 3048
Joined: Fri Aug 05, 2011 4:59 am
Location: AK, Fairbanks
Name: Michael
Vehicle Year: 2004
Vehicle: Chevrolet TrailBlazer
DriveTrain: 4WD w/ Aftermarket Locker
Rank: Expedition Rated

by jonbo2002 » Mon Aug 05, 2013 8:21 pm

good point
jonbo2002
Addict
 
Posts: 509
Joined: Fri Mar 29, 2013 8:22 am
Location: MI, Springport
Name: Jon
Vehicle Year: 2002
Vehicle: Chevrolet TrailBlazer
DriveTrain: 4WD w/ G80

by Conner299 » Mon Aug 05, 2013 8:35 pm

I may not have seen it, but you could also add a link to Mayo3LT'S YouTube video, in your original post. Would also be good cross advertisement for GMTNation, as well, since he's a member there.
I DON'T care what my GMT360 was designed to do, I care about what it can do!
User avatar
Conner299
Addict
 
Posts: 706
Joined: Mon Oct 29, 2012 8:47 am
Location: KY, Louisville
Name: Ed
Vehicle Year: 2005
Vehicle: Chevrolet TrailBlazer
DriveTrain: 4WD
Rank: Trail Ready

by Conner299 » Mon Aug 05, 2013 8:41 pm

For the spark plugs, number 5 and 6, I found the perfect tool for getting them out. They are hex head plugs that fit in the hole, on an extension, where the ratchet would go. I then use a gear wrench, on this. Way easier than an extension, swivel, extension, and then ratchet.

EDIT: http://m.craftsman.com/productdetails.d ... 943303000P
I DON'T care what my GMT360 was designed to do, I care about what it can do!
User avatar
Conner299
Addict
 
Posts: 706
Joined: Mon Oct 29, 2012 8:47 am
Location: KY, Louisville
Name: Ed
Vehicle Year: 2005
Vehicle: Chevrolet TrailBlazer
DriveTrain: 4WD
Rank: Trail Ready

by Diacom » Mon Aug 05, 2013 9:53 pm

Conner299 wrote:For the spark plugs, number 5 and 6, I found the perfect tool for getting them out. They are hex head plugs that fit in the hole, on an extension, where the ratchet would go. I then use a gear wrench, on this. Way easier than an extension, swivel, extension, and then ratchet.

EDIT: http://m.craftsman.com/productdetails.d ... 943303000P


A body lift helps too...
Diacom
Addict
 
Posts: 881
Joined: Fri Jul 23, 2010 9:08 pm
Location: NV, Yerington
Name: Noel
Vehicle Year: 2003
Vehicle: Chevrolet TrailBlazer
DriveTrain: 4WD w/ Aftermarket Locker

by DirtyBacon04 » Tue Aug 06, 2013 3:41 am

Had a feeling someone was going to bring up the body lift...
Trans-Continental Trailblazer - 5th Award
Current Count of Transmission Rebuilds: 5.5
***The more you know, the less you need.***
USMC '07-'12
Dirty Bacon's Build
User avatar
DirtyBacon04
Moderator
 
Posts: 3048
Joined: Fri Aug 05, 2011 4:59 am
Location: AK, Fairbanks
Name: Michael
Vehicle Year: 2004
Vehicle: Chevrolet TrailBlazer
DriveTrain: 4WD w/ Aftermarket Locker
Rank: Expedition Rated

by dirty anton » Tue Aug 06, 2013 10:50 am

I highly recommend the throttle body cleaning to anyone with a lot of miles or just older truck. This is probably one of the single best things and ( cheepest)I have done that made a difference in the way the motor feels after a tuneup. Before I did this the motor would sound like it was dragging when I turned the steering wheel while stopped. Good write up!
User avatar
dirty anton
Trail-Blazer
 
Posts: 426
Joined: Thu Aug 19, 2010 12:21 am
Location: upper marlboro md
Name: mike
Vehicle Year: 2002
Vehicle: Chevrolet TrailBlazer
DriveTrain: 4WD w/ Aftermarket Locker
Rank: Extreme Offroader


Return to Truck Discussion